Internet content gets recycled and we all know that. Some use it for their own personal benefit while some use it to make a living. Photos, one of the more recycled content in the Internet, most of the time is either saved or copied without giving credit to the ones who put it up.
These are the cases where copyright infringement may occur and we do not want that, right? So first things first – how does a copyright issue come across?
Well say for an instance, you took a photo and posted it in your websites for any reason at all – for your own personal design, to showcase your skills, to advertise your business, etc. You hang out on the web all day and all of a sudden, you come across the photo you’ve put up and you see that it is being used by another person who claims that it is theirs. How would you feel about that?
The Internet is a massive place, believe me and whatever the reason is, photos will be there always. There are tons of image search engines you can choose from say for a school project, for your blog, you need to advertise a skill or a service, or whatever your personal intentions are. You need to make sure though that the photos you are about to grab can be reused – how do you check on this with the Google Image Search Engine?
The Google Image Search Engine is the most used photo search engine all over the world, today. Millions of people search photos every fraction of a second and it is unlikely that this would change. What you need to accomplish is for you to ensure that the photos you get have its own permission to be reused by other people.
Read: 7 Helpful Tips in Searching Google That 95% of People Do Not Know About
So back to the question, how do you filter Google Image Search by its usage rights so you are confident that what you are grabbing can really be grabbed?
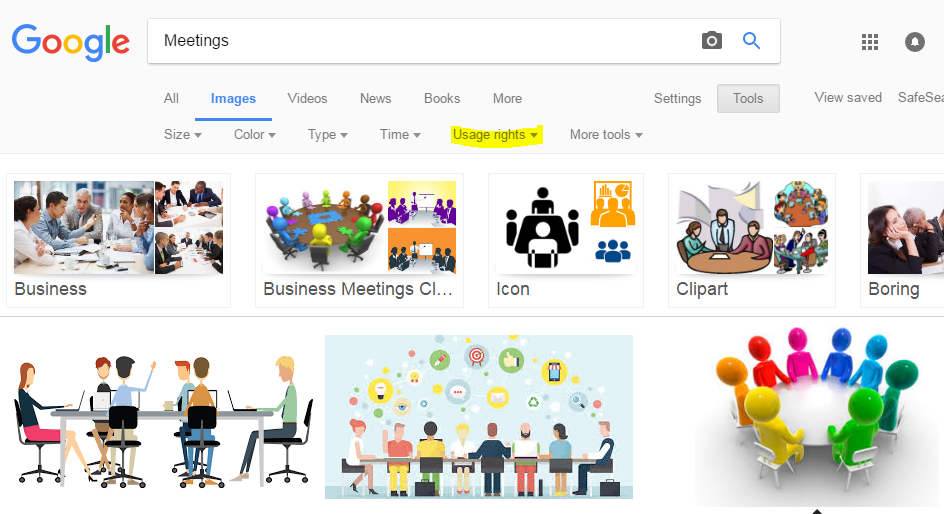
Go to the Google Image Search website and search for an image.

For this example, I tried searching for “meeting pictures” because I need to market my counseling and reporting skills for my new blog about meetings, talks, reports, etc.
Now, you see the “Tools” category on the right-hand side of this window? Click on it and you’ll be able to see the following criteria:
- Size
- Color
- Type
- Time
- Usage Rights
- More tools

In this case, what we want is to filter the usage of the uploaded photos, correct? So we then click “Usage Rights.”
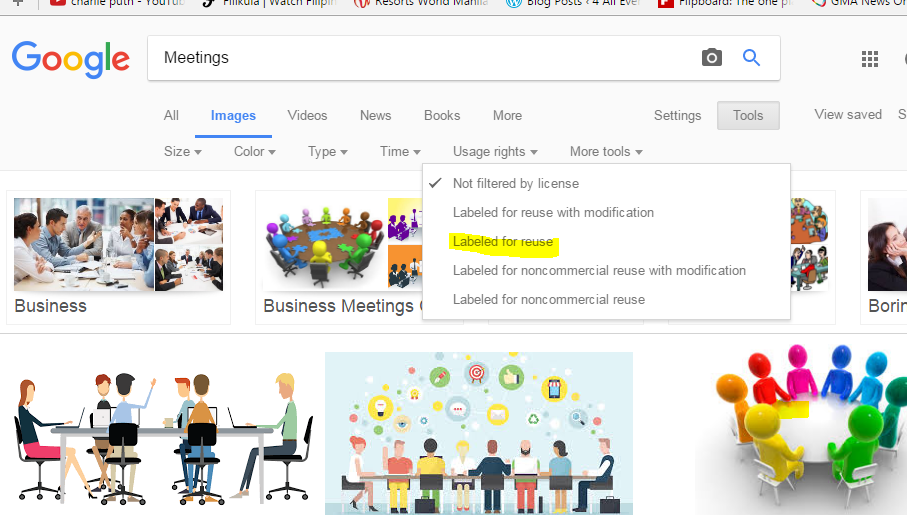
Selecting this would prompt you again to choose from the following:
- Not filtered by license (Default)
- Labeled for reuse with modification
- Labeled for reuse
- Labeled for noncommercial reuse with modification
- Labeled for noncommercial reuse

For us to be able to see the photos which have the permission to be reused, we simply click on “labeled for reuse.”
Here, you can now select a photo, copy it wherever you want but of course do not forget to give credits or to give source.
With this, you can be assured that you are not violating any acts that are against the law and that you are not offending other people by virtually stealing what they own.
Read Also: How to Mute Individual Tab in Google Chrome Browser