One of the best features of WordPress is having a plugin that can easily install to add more customization. It makes website development easier for the less experience user, anybody can create their own customize WordPress website by using a plugin.
But, for those that still don’t know how they can install a plugin on their WordPress website, in this article I will show you three different ways that you can use to install a WordPress plugin.
I just want to remind you that you can only add or install plugin if you have a self hosted WordPress.org site not WordPress.com see the difference or WordPress.org and WordPress.com in this infographic.
Now, if you are using self hosted WordPress.org you can install WordPress plugin by following any of these three methods.
Installing WordPress Plugin using Admin Panel search option
Installing plugin using search option is the easiest way to install the plugin, but the plugin that you are going to install must be in the WordPress plugin directory only free plugin that follow GPL and all WordPress guidelines are listed in this directory, if you’re trying to install premium plugin you can use the upload method.
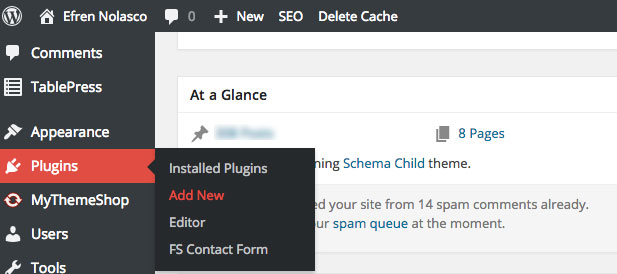
- To install a plugin using search, go to dashboard or admin panel and click on Plugins > Add New

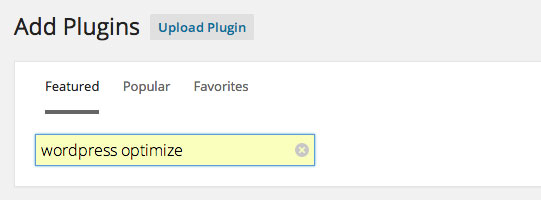
- Search the plugin that you want to install on the search bar

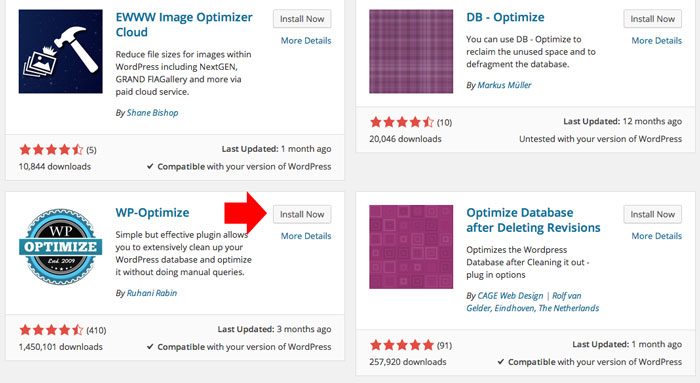
- Select the plugin that you are going to install, then click install

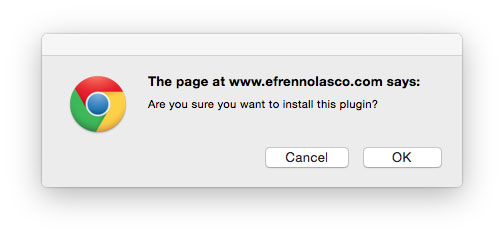
- Click OK to start downloading the plugin and confirm the install

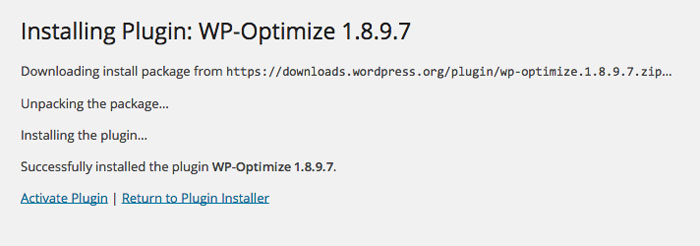
- After downloading and installing the plugin, you will see a success page like on the screenshot below, Click on “Activate Plugin” link to activate the plugin.

Installing WordPress Plugin using Admin Panel upload method
You can use this method if you cannot find the plugin in the WordPress plugin directory. The reason why the plugin is not included in the directory is either it was a paid plugin, or a non-GPL plugin.
- To install plugin using upload method, make sure that you have already downloaded your plugin. The plugin is in a zip file format no need to extract you can upload it directly. If you have it on your hard drive, again go to Plugins > Add New, then click on “Upload Plugin” button.

- Find the plugin zip file, but clicking on the “Choose File” button then click Install.

- The plugin will be uploaded on your server and automatically installed, you will see a window like the one below, which confirm that the plugin are successfully installed, don’t forget to activate.

Installing WordPress Plugin using FTP manager
This method is for advance user only, if you are not familiar with using FTP or File Transfer Protocol better to use the two methods mentioned above, but if you want a complicated procedure you can follow this guide.
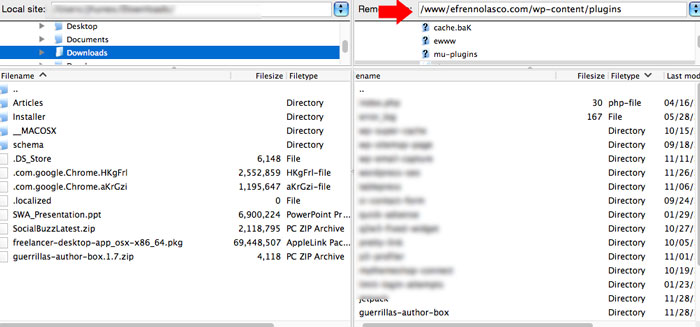
- To install plugin using an FTP manager, you may need an FTP software like Filezilla, when you have it installed and connected to your host, access the plugins directory of your site (/wp-content/plugins) see the screenshot below. Your website plugins directory located in the right of the screenshot and on the left is the file on your PC, you can easily drag and drop the plugin file from your PC to the plugin directories to the right.

- After you uploaded the plugins using FTP, you will need to activate it on your WordPress admin panel. Go to dashboard, click Plugins, you will now see the plugin you uploaded in the list of plugin installed, to use the plugin click the activate like.

That’s it, please note that the screenshot in this tutorial is taken from WordPress 4.0.1 version, since WordPress constantly releasing updates, please feel free to let us know if you notice something different. We are trying to make this tutorial up to date.



Thanks for the article. Now your website has gained another loyal follower.
Waiting for more content like this.