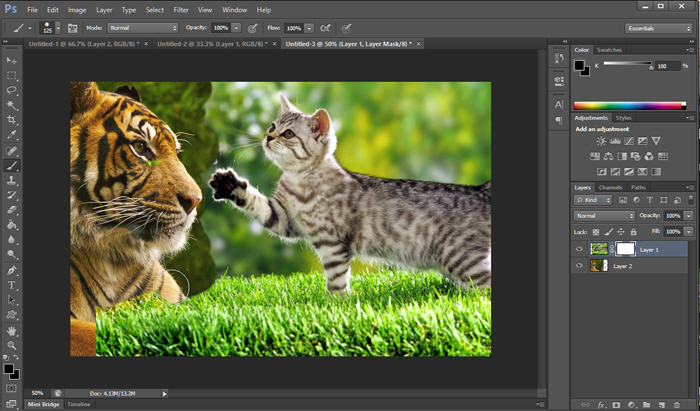
Just like in reality, there are masks or layer masks in Photoshop which you can use in order to mask a particular image, layer, text, or object in Photoshop. To understand masks, you need to know that there are two (2) primary types of masks in Photoshop namely: Layer masks and Clipping layer masks. You will know more of them in a little bit.
What are masks?
Even though we compared reality to Photoshop in the earlier part of this tutorial, the term mask is not actually far from what it really means. The term “mask” in graphic design is applying something to a very certain point of an image. Basically, it is adding something, whether it’d be a background, a design, an image, to an image.
Layer Masks
A layer mask is something that you apply or add in a particular image or layer to control the transparency of the layer. When you add a mask to a given layer, that mask covers the entire layer with an invisible grayscale canvas. Applying a mask to a layer does not really make any immediate visual changes unless you have a selection active at the time.
Read: Basic of Photoshop – Layer Style
Clipping Layer Masks
Clipping masks are, as a matter of fact, no different from layer masks the only difference is, they use another layer to determine the transparency of a new layer. In simpler terms, you have two image layers stacked to one another and by clipping them, the bottom layer determines the transparency of the top layer.
Instead of using grayscale canvas, the clipping masks sort of borrow the transparency from the layer below them. Say if the bottom layer contains areas that transparent, putting a clipping mask will apply these containments to the top layer.
How can I make my own layer masks?
Okay so now that we are fully aware of what layer masks are, it is time to mingle with our creativity on how we can utilize this to create breathtaking and amazing edits. The first thing you need to do, is to find two (2) images that would somehow complement each other. The general idea is to take something from a photo and apply it to another photo – it is something like blending two photos to get one better picture.
Remember that the top picture will determine how the edit will look like so you should set the top layer (clipping layer) what you want it to be. In order to neutralize same colors, you should set the blending mode of the top layer to “Screen” so you would not have any confusion. While the top layer is selected, click on the “add mask” button on the lower part of the screen. It is the rectangular shape with a circle in the middle.
By clicking on it, you will have a mask that will appear beside the selected layer in the layers palette. Selecting the mask will cause your top layer mask to disappear; this is to erase all unwanted portions of the top layer that you do not want to appear on the created picture. To erase it, grab a black brush and paint gently the portions that you do not want to appear in the image you want to create.

Why don’t just erase it?
In Photoshop, erasing means totally destroying an image; once you learn how to properly use masks, you would like to just have that eraser tool removed from your bar, completely. What the eraser does is that it destroys pixels completely without having to recover back the destroyed pixels.
This is just the basics of masking, if you want to continue learning about more advanced and complex masking, stay tuned for more.
More on Photoshop