So we have learned about the different tools, and the layers panel; that’s actually there is for you to start your journey in handling Photoshop. What you’re about to learn next is the very essence of you, wanting to learn about Photoshop – editing. This lesson will revolve around the ability of Photoshop to correct colors in the biggest ways possible.
Color Correction
Many of us are quite alarmed by this; there are times when we want a certain color to be there but the digital world conspires and make everything the opposite of what you want. Color correction in Photoshop is not as complex and complicated as you may think. The only skill you have to know when you touch color correction is your knowledge to know what colors are complimentary and what colors dominate in an image.
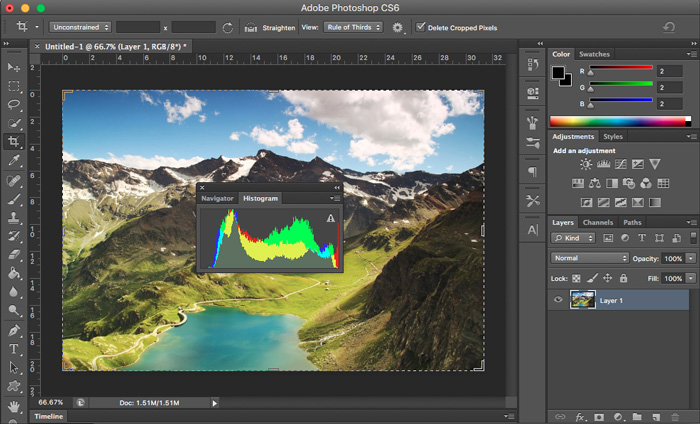
So, the dominant colors; if you are unable to spot what color dominates the scene, you can use the histogram to aid you. You can access the histogram by clicking on Window -> Histogram. Once you access the histogram, you will see a graph of colors dependent on how the image looks like.

The left side of the histogram represents the shadows, the right side of it represents the highlights, and the middle part represents the midtones. If a certain color is dominating the image in any area, you will see that dominating that space on the histogram. This is a great feature for noticing any corrections that you probably should do.
Adjustments
Now that we know what needs to be replenished, you now just have to make adjustments to that one, correct? You can find adjustment tools and options in these places in Photoshop:
Standard adjustment to a single layer
Image -> Adjustments and then you are free to choose what adjustment you want to perform.
Adjustment layer meaning that you can adjust multiple layers by using this adjustment layer and you can adjust after application.
Layers -> Adjustment Layer
Color Balance
The Color Balance is a tool that you can use to modify minor adjustments to a certain area or image. If an image was taken under low-light, then we know that the brightest parts of the photos are a bit too red, you can use color balance for that; adjust the redness to create a blended mixture of colors in par with one another.
Play around with it, see what it can do. It can be a very mindful tool for something that needs minor and quick changes. You can find the color balance in Layer -> New Adjustment Layer -> Color Balance.
Curves
Curves is definitely the most complex (in relation to other tools) but the most effective tool in Photoshop as regards color adjustments and corrections. It can make you feel a little bit intimidated because Levels work well enough as Curves but it is different. Take the time to learn it because it is powerful, flexible, and it is very effective.
To make a point on your curve, just click anywhere on the line and drag it in a particular direction; dragging it towards the top left corner brighten things up while dragging it towards the bottom right corner darkens it – you get the picture, right? You can access the curves at Layer -> New Adjustment Layer -> Curves
You can watch videos on how to deal with curves as it is an all-around tool, very neat and flexible tool that can make big changes on your images.
Levels
Levels work just as much as Curves but it has more guides and more beginner-like features. The Levels has three main sliders: On the right side, you have the highlights slider; moving it to the left increases the intensity or the focus of the highlights in your photo, in the middle; you have the midtones slider; moving it to the left causes your photo to brighten up while moving it to the right darkens it. One the lft side you have the shadows slider, moving it to right increases the intensity of the shadows.
There are however, two (2) more sliders on the bottom part of the levels panel. Under Output Levels, moving the black slider towards the white one will lighten things up and moving the white one towards the black one will darken it. This one works on the brightness of the photo.
You can watch videos and tutorials on how to fully master this feature remember, although it works as well as curves, the two has different ways of dealing with colors and it should not be neglected.
Auto-Tone
Just like any other program, Photoshop has its own “system drive” to. If you want Photoshop to make major adjustments on your image by itself, you can just click on the Auto tone feature. You can find it at Image -> Auto Tone. Some people are satisfied with its results and some aren’t. You can always undo an action in Photoshop if you aren’t happy with the auto tone but if you are, then you have saved an ample amount of time.
So now you know about color correction, stay tuned in order for you to know more about re touching and enhancing photos.