WordPress is a one of the most powerful blogging software used by over 90 million websites, a Content Management System (CMS) based on php and MySQL. It features a plugin architecture and template system where you can easily add more features by installing free plugins available and change the overall look of the website by installing new templates or themes.
It only requires basic computer knowledge to manage websites with WordPress CMS. This is one reason why most bloggers prefer to use this platform to focus on writing good content for their readers and minimize the time maintaining the entire website.
To run a WordPress website you need a Web Host or server to make it accessible anytime, anywhere, and in this tutorial we are going to use HostGator. If you don’t have one you can follow my post on how to sign up on HostGator.
Install WordPress on HostGator cPanel using QuickInstall
OK, to begin the installation of WordPress on HostGator cPanel, follow the step by step instruction below.
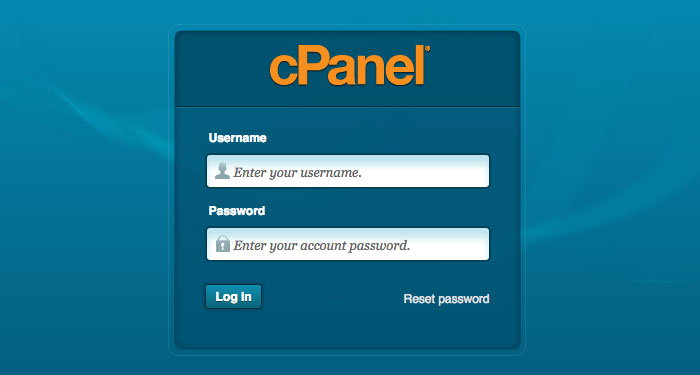
- First, you need to login to HostGator cPanel. All of the credentials to access your cPanel will send to you by email when you sign up in HostGator, including your cPanel address, username and password.

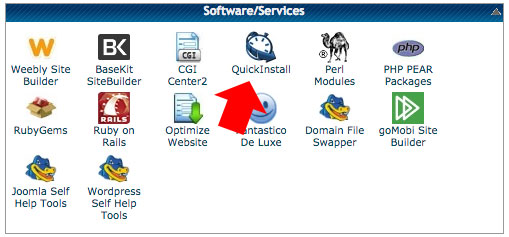
- After you login, scroll down to Software/Services section, then click on the “QuickInstall” icons begin the installation.

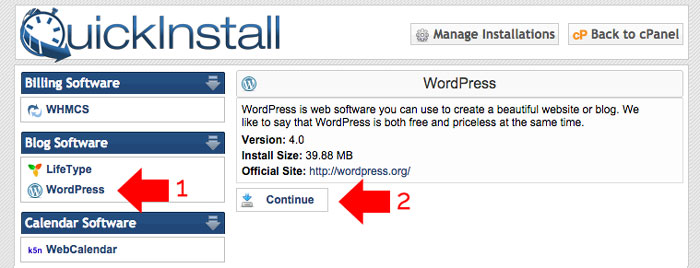
- On the QuickInstall page, select “WordPress” in the left sidebar, then click “Continue”.

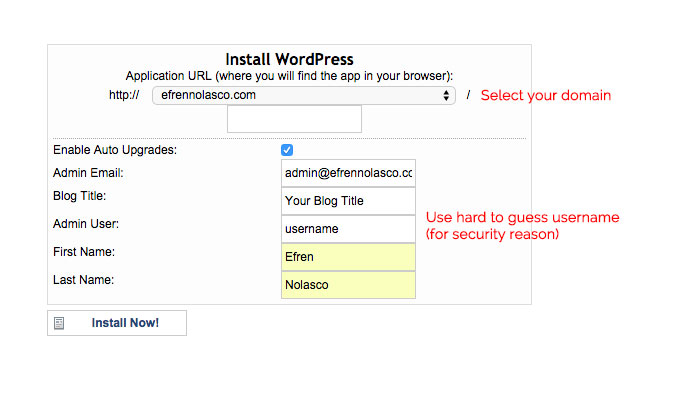
- Fill out the field completely, first select the domain where you want to install the WordPress. If you have a HostGator Baby Plan or above, you can add unlimited domain. You can also choose whether you want to install in root directory (https://www.efrennolasco.com/) or subdirectory (https://www.efrennolasco.com/blog). When all are set click “Install Now”.

- It will take a few minutes to install WordPress on your HostGator server. After the installation finished, all your login credentials will be sent to your email you enter in the Admin Email field. To access the WordPress admin panel go to (yourdomain.com/wp-admin) replace “yourdomain.com” with your domain name and login using the credentials you received.
OK, that’s it you have now successfully installed WordPress in HostGator, if you have any questions or encounter problems while installing drop a comment below.


