By default, the WordPress username cannot be changed in the admin panel, but if you are the administrator of the site, changing the username can add more security to your WP blog. By using hard to guess username is a plus for your security than making it your name, nickname or admin that are the target of hackers.
Although you can create another user and grant him with admin role and transfer all your posts to the new account and delete the old one, this is kind a hassle.

Using these simple steps, you can change the WordPress username easily by accessing your Web Host cPanel. To make it easy for you and avoid mistakes that will break your site, I will make this step by step instructions with screenshot included. Just follow along and you’ll be fine.
Note: I’m using Hostgator Web Host to demonstrate this tutorial.
- Login to your Web Host cPanel, scroll down to databases section, then click “phpMyAdmin” to open the database.

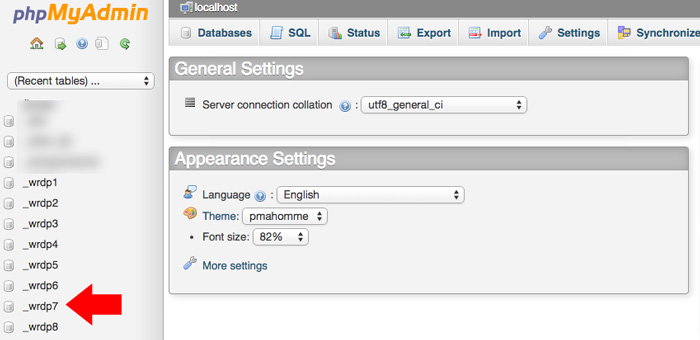
- On phpMyAdmin page, left side, you will see a list of your databases if you have many. Be sure to select the right database.

- Locate and click wp_users table to open the list of users registered on your site.

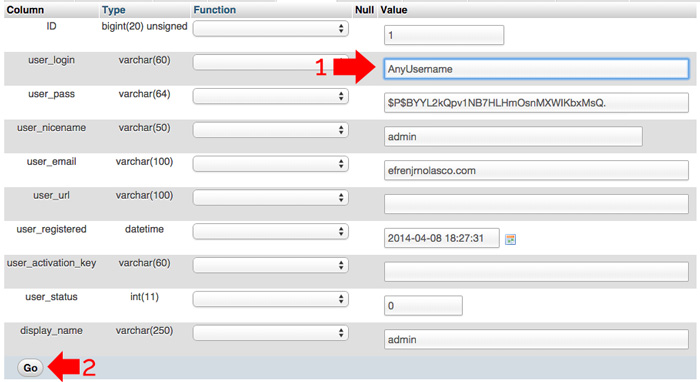
- Click edit, on the username that you want to edit.

- You can now change the username to any name you want.

That’s it, you can now go back to WordPress admin page and use your new username to login, your password is the same unless you changed it. Enjoy


