Just like our visions, the cameras of our smartphones fade, become blurry, or be damaged by time. No matter how careful you are, time will come when the cameras that you thought were perfect will become faded and clouded. Also, there are times when you drop it, and the camera just becomes slashed or damaged.
Your phone is good but the camera isn’t; you want to replace the camera alone and keep the phone, but how can you do it? Repairmen replace cameras but with a high price. In this article, you will learn how to replace the camera of your smartphones excluding iPhones because iPhones are delicate and they are needed to be repaired by professionals.
Materials:
Before anything else, you will need materials in replacing your smartphones, and the materials you would most likely need are:
- Precision tools
- A cup for the screws
- A cloth
- New camera (if needed)
- Plastic opener
Case #1 if only the camera glass is cracked, not the camera itself.
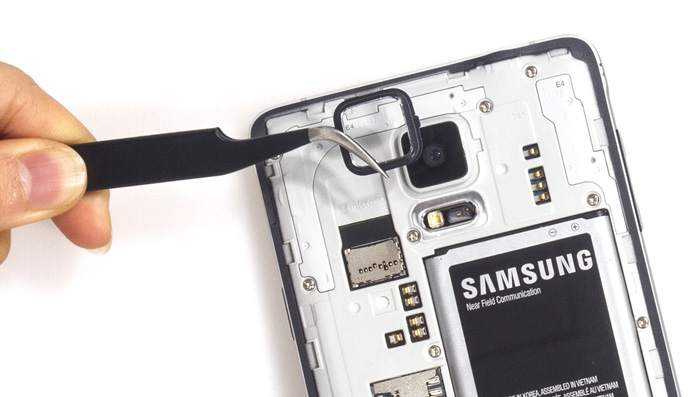
- Remove the rear case of the phone using the plastic opener. You can just use your hands for this but to avoid cracks and scratches, it’s best to use plastic openers.
- Remove the battery, the sim card, and the micro SD card.
- Unscrew all that you need to unscrew. Carefully place all the screws in the cup to avoid losing screws.
- Detach and pry all the cables/connectors that you need to detach in order to get to the rear-facing camera (Wi-fi, front-facing camera, digitizer cable, display data cable)
- Remove the motherboard.
- Turn it over and disconnect the rear-facing camera cable to remove the camera from its place.
- Get the glass of the camera and replace it.
Case #2 the camera is cloudy, blurry.
- Remove the rear case of the phone using the plastic opener. You can just use your hands for this but to avoid cracks and scratches, it’s best to use plastic openers.
- Remove the battery, the sim card, and the micro SD card.
- Unscrew all that you need to unscrew. Carefully place all the screws in the cup to avoid losing screws.
- Detach and pry all the cables/connectors that you need to detach in order to get to the rear-facing camera (Wi-fi, front-facing camera, digitizer cable, display data cable)
- Remove the motherboard.
- Turn it over and disconnect the rear-facing camera cable to remove the camera from its place.
- Clean the camera by turning it upside down. Be sure to work under a cloth to avoid scratching it causing it to have more damages.
- Use clean cotton submerged in alcohol for cleaning and air-dry it.
Read: How to replace Samsung power button
Case #3 camera replacement full
- You can buy camera replacement from mobile stores or even people who offer the cameras of their smartphones. Just make sure that you have the exact model and type of phone with the camera you want to replace it with.
- Remove the rear case of the phone using the plastic opener. You can just use your hands for this but to avoid cracks and scratches, it’s best to use plastic openers.
- Remove the battery, the sim card, and the micro SD card.
- Unscrew all that you need to unscrew. Carefully place all the screws in the cup to avoid losing screws.
- Detach and pry all the cables/connectors that you need to detach in order to get to the rear-facing camera (Wi-fi, front-facing camera, digitizer cable, display data cable)
- Remove the motherboard.
- Turn it over and disconnect the rear-facing camera cable to remove the camera from its place.
- Take the camera off and then replace it with the replacement that you have.
So that is how you replace cameras. You do not really need to be a professional in doing so, you just have to be careful and you need to be patient in researching what you need to know in order to perform this repair. Take note that this applies mostly to Samsung Galaxy Phones, HTC phones, Lenovo phones, and other android-ran phones that can be opened. Apple products are very versatile and sensitive so it’s best to leave it to the pros. Good luck in replacing your camera.
Read Also: How to replace broken smartphone LCD